How to Make a Halloween Wreath for Less Than $35!
Two words: Michael's and coupons.
Truth be told I set out to Michael's to buy stuff to make the loved one's girls their 2016 Halloween Trick-or-Treating bags. I had received an email from Michael's for that day or week's coupon and without even knowing what would be on sale I just went. I do/did not have a lot of opportunity to make these this month because of travel plans so I knew I needed to just pick up a few things and knock them out. However, upon entering the store I discovered that all Halloween EVERYTHING was 50% off plus I had my coupons (40% off one non-sale item and 20% off total purchase). Score.
After meandering around the entire store in search of some pre-cut felt items like I happened to find last year I had managed to convince myself that yes, indeed, I WOULD make them a Halloween wreath. After all, the fall wreath I made last year was super easy! So back and forth up and down the aisles I went a second time to procure the essentials I wanted to use.
I'm a rule follower to the max, therefore I played it safe and picked up similar things as I used to make the fall wreath only each of these things were Halloween themed. Without regard to costs I loaded up my cart with items for the wreath, items for the bags, and a bunch goodies/treats to put in the bags as gifts. I was shocked to discover my total purchase. After the 50% off Halloween items, 40% off coupon applied to the grapevine wreath not on sale, plus 20% total purchase I totaled out at $59! I sat down this morning to calculate the actual cost of the wreath items: $31.63. Yep. I rounded up in the title a bit because your coupons may vary and sales may vary so of course, you could end up spending closer to $40 (or more depending on what you buy).
The felt items and garland were for the Trick-or-Treating bags, everything else was for the wreath.
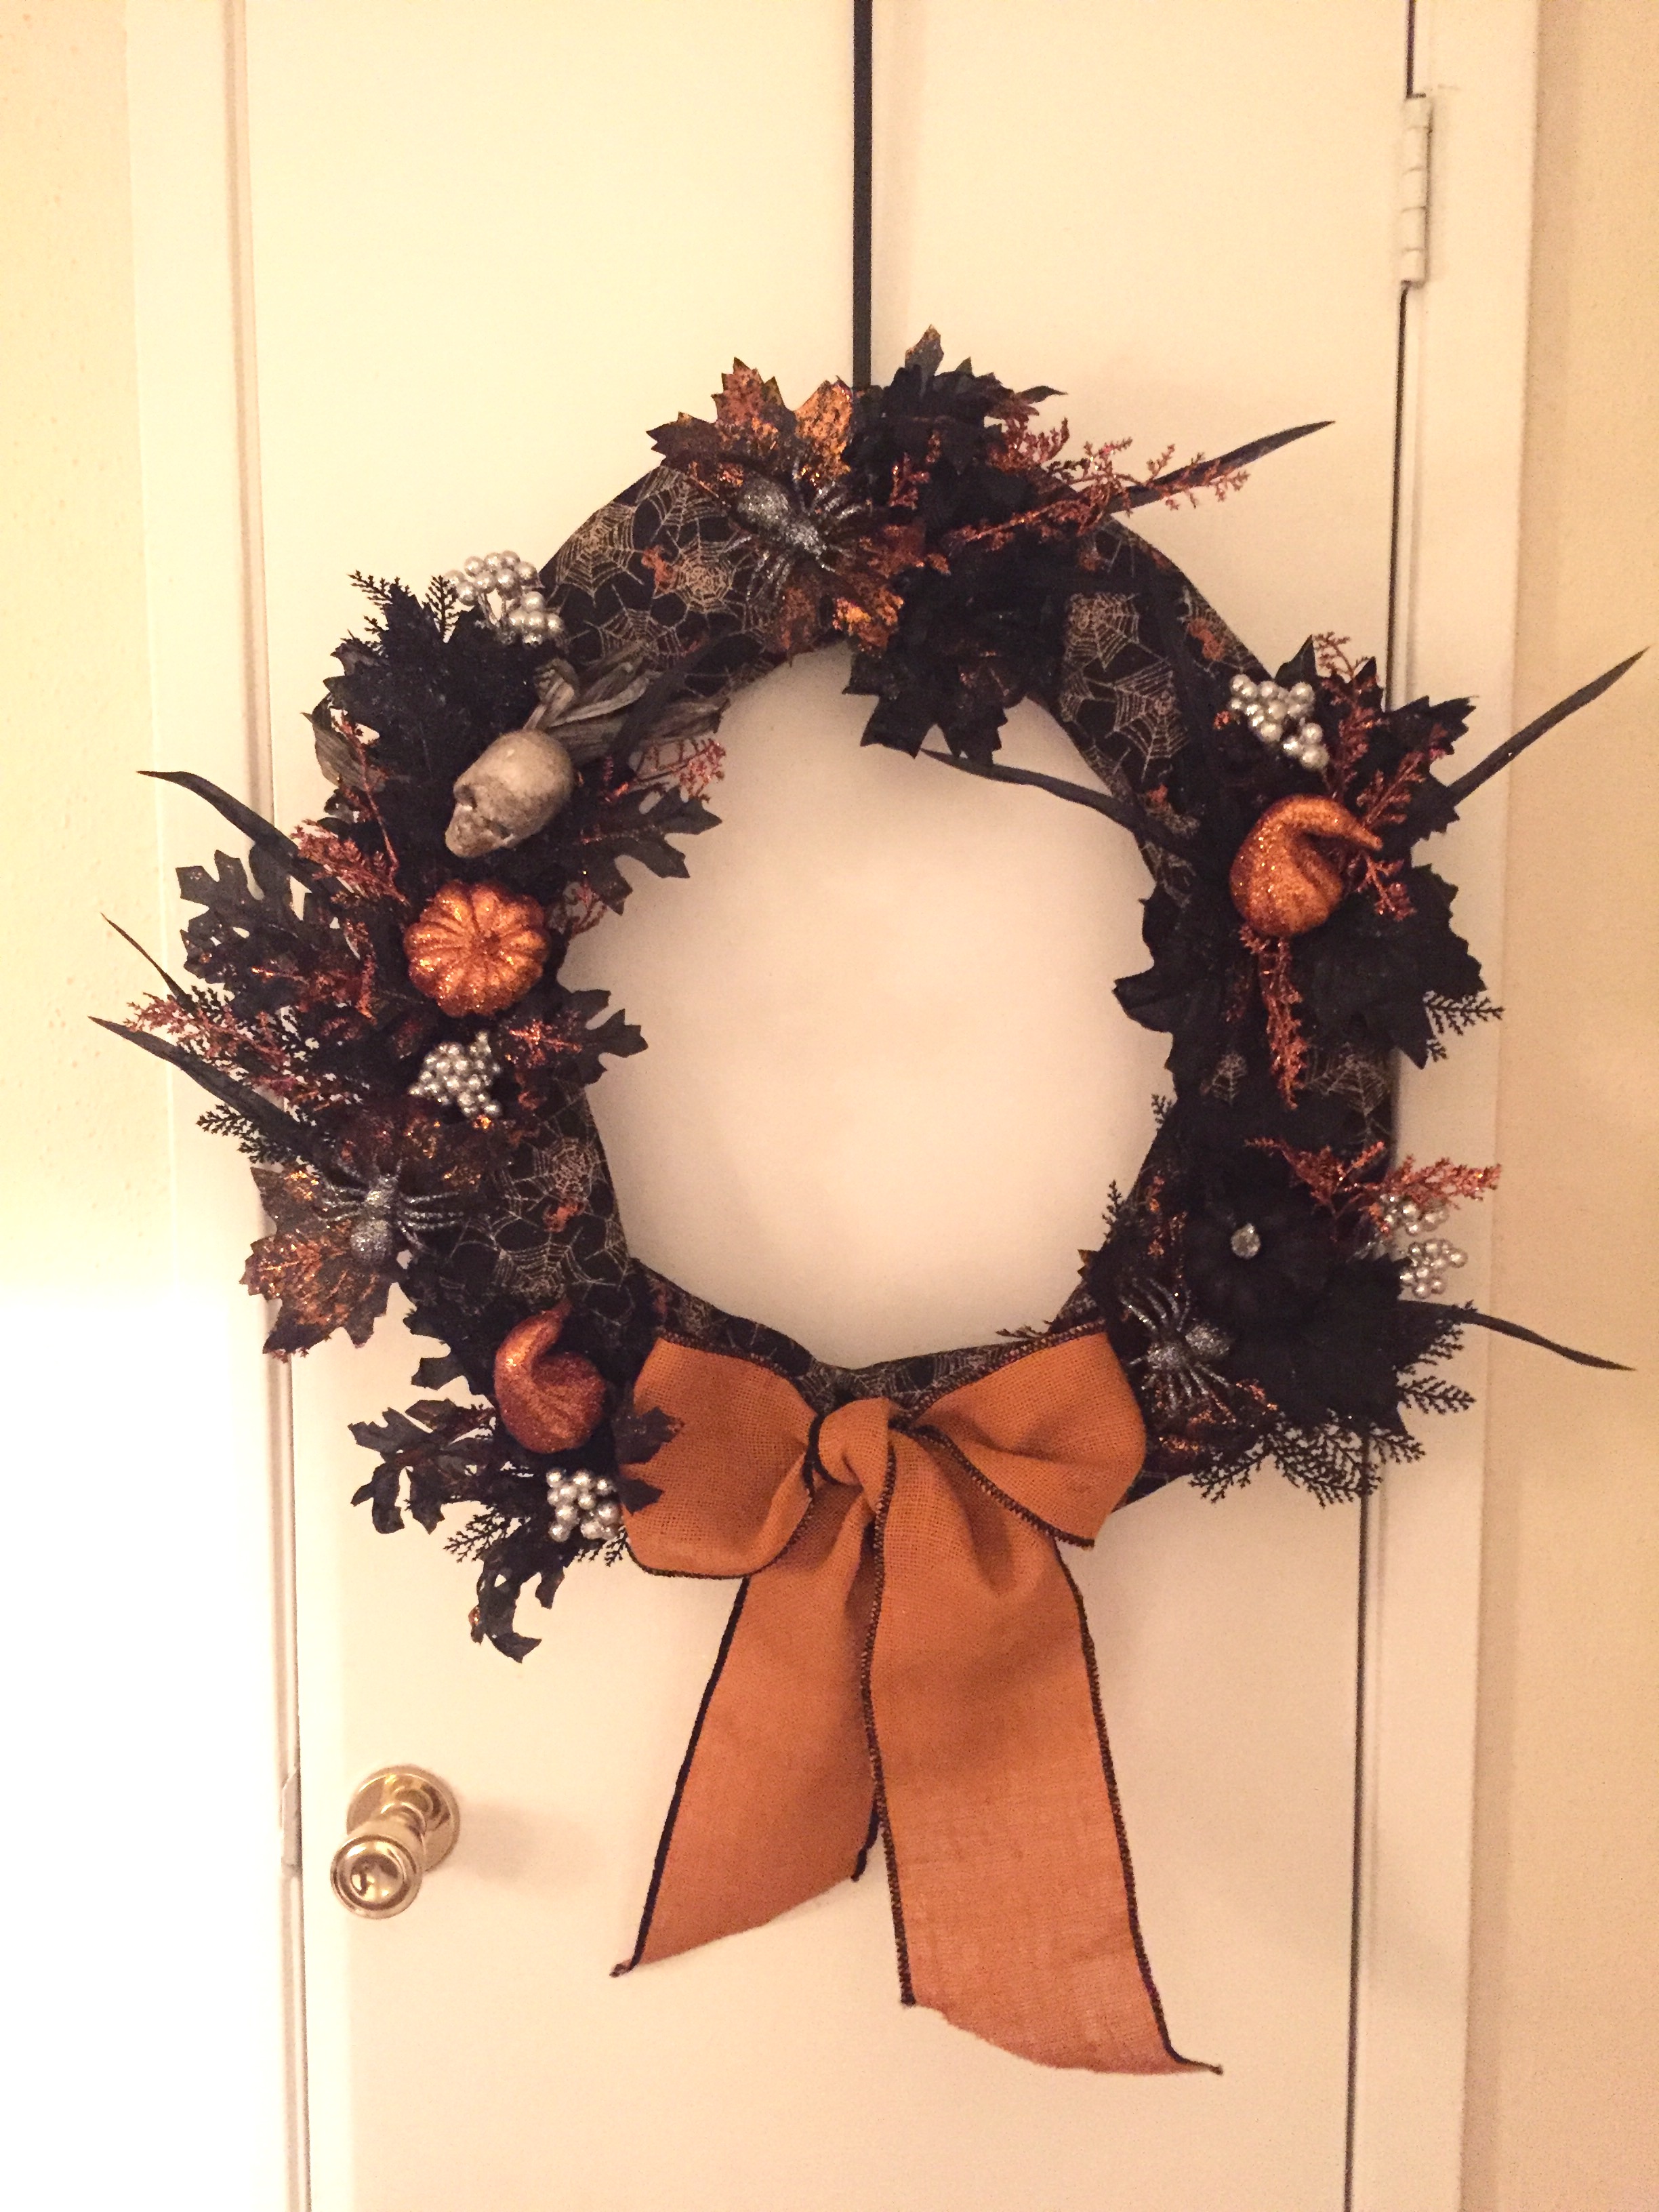
Items purchased for the wreath: 24" grapevine wreath, orange burlap ribbon, black spiderweb burlap ribbon, white gauze (didn't end up using), and five spooky floral stems (some with just black or orange leaves, and some with pumpkins or spiders and skulls on them). $32 of magic right there.
The how-to part of making the wreath is easy and will mimic my previous post almost identically. Make sure you have floral wire, wire cutters, scissors, and a hot glue gun!
I laid out the items to use and assesses which side of the wreath was the top. Then I wrapped the black burlap ribbon around the wreath leaving parts of the wreath exposed. You need area exposed so that you can shove the floral stems and decor into the wreath. There is no right or wrong on this and I sort of like the wreath not to be too perfectly symmetrical. I don't know why. Once you have the ribbon on there you can either tuck it into the wreath or use a clothes pin to temporarily secure it. You will hot glue it later, but for now it's best to wait in case you need to make an adjustment.
Next I started trimming and cutting off pieces of the Halloween floral stems as I worked and plugged them into the wreath's vines. Work your way around the wreath in sections. I finish one section at a time. As the wreath fills out you'll be able to make adjustments if one area seems more full than another.
When you're finished filling in the wreath and making adjustments, you can attempt to make a bow. I say attempt because that's all I can do. They did not have a pre-made Halloween burlap bow. Whoa was me. I considered not even adding a bow because I am that terrible at making one. But, I tied a basic bow anyway, pulled floral wire through the base of the bow to secure it to the wreath, then used a lot of hot glue to slowly and carefully attach the bow to the wreath permanently.
This is after wiping up what looked like pounds of glitter...
Once you have this completed, you can begin to carefully secure the floral stems and decor attachments. I work one section at a time, lifting up the items a tiny bit to get the hot glue gun underneath it, and carefully coat the stems to the wreath. Take your time doing this, it's not a race and you want it to be secure AND look good, not have hot glue showing everywhere!
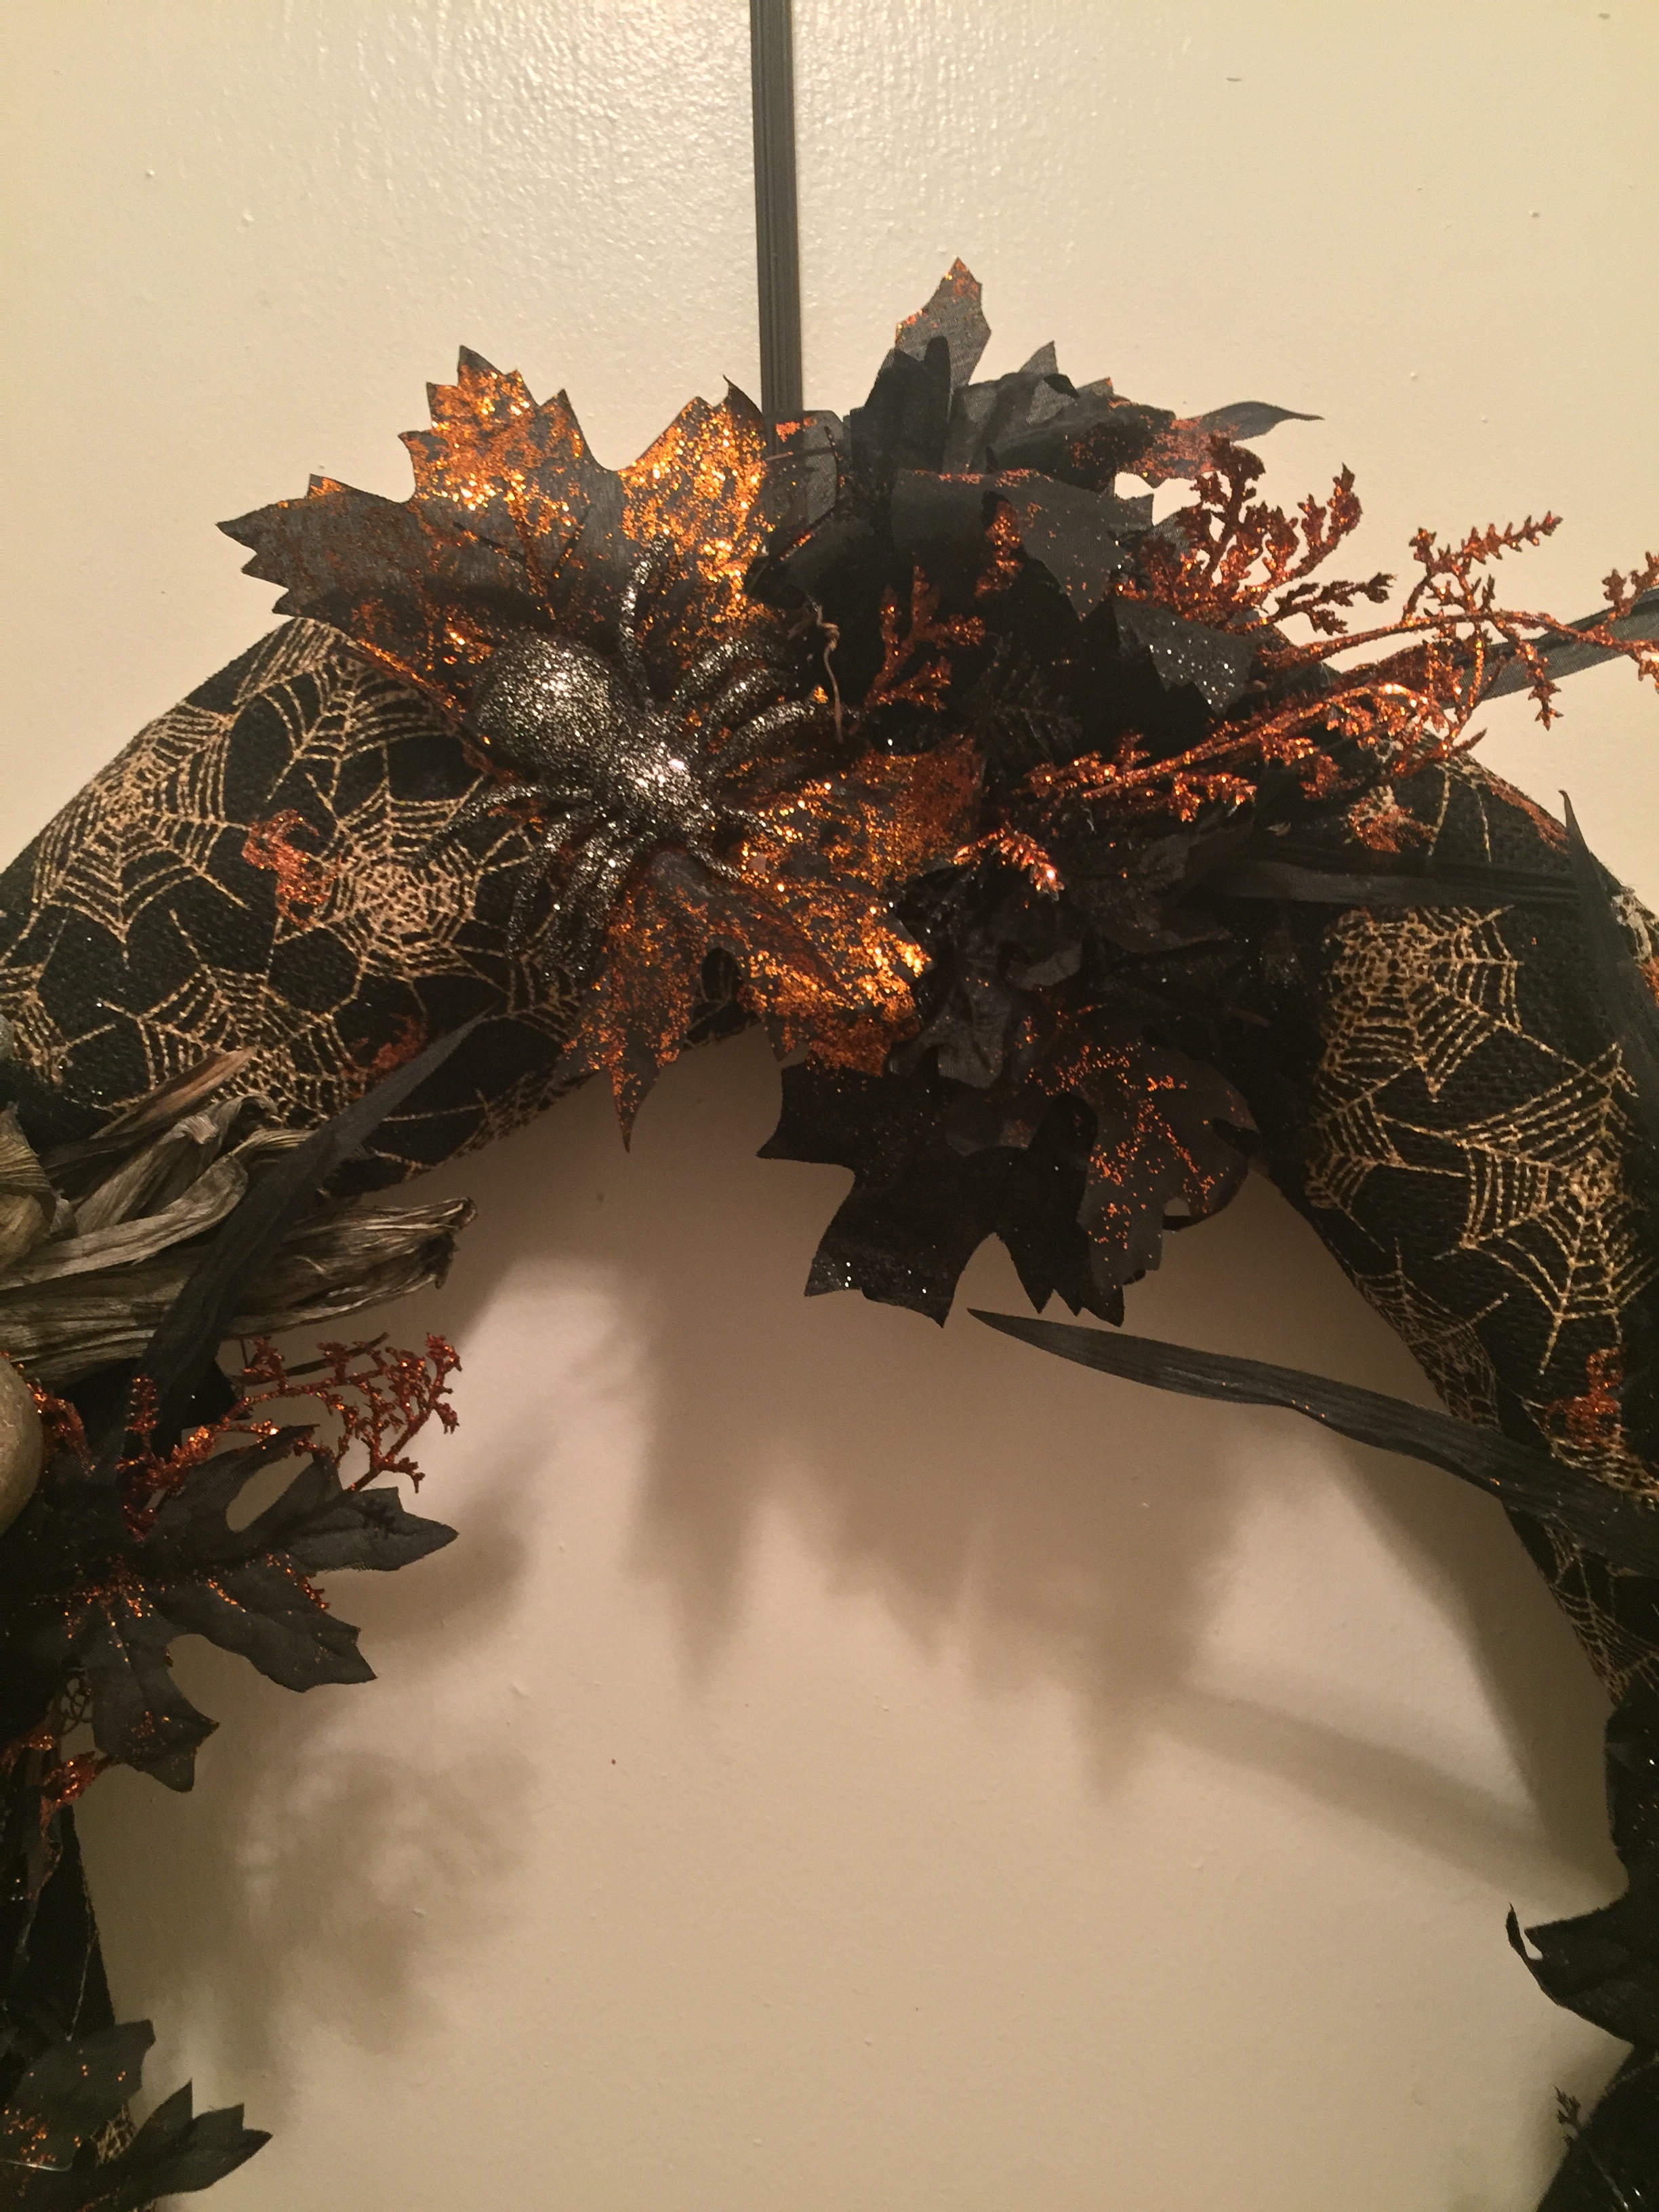
The coloring may vary slightly in the images below because I've had to lighten some more than others so you can see the details of the black leaves etc. With so much black on black it is hard to tell what is on there so I also took pictures up close.
Finally, when you're done with this, you can bask in the glory of your accomplishment. You've made a beautiful wreath for Halloween. Hang it up! Pour a glass of wine (if you haven't already) and enjoy cleaning up the millions of specks of glitter everywhere...
Good luck!! If you enjoyed this post please share it with your DIY crafting friends!
XOXO


