Paleo Vanilla Cake with Chocolate Ganache
Monday's Menu:
Print the Paleo Vanilla Cake with Chocolate Ganache recipe here!
Happy Monday everyone! Let's kick off this week with a treat...a deliciously chocolate treat. Plus, isn't it pretty? It is actually a vanilla cake even though the sides look brownish in color. Oh, and it's Paleo. That's right. This beauty right here is gluten free, grain free, and refined sugar free. It is sweetened with honey and maple syrup though so don't get your hopes up on it being carb free or calorie free. We can't win them all...or can we?
The menu (Paleo friendly): vanilla cake with chocolate ganache
Shopping List
For the cake: This makes ONE 9-inch cake so if you want layers like I have you'll need to multiply this times the number of layers you want!
- 1 1/2 cup blanched almond flour
- 1/4 cup coconut flour
- 2 tbsp. honey
- 3 eggs
- 1/4 cup coconut oil, melted
- 3 tbsp. unsweetened almond milk
- 2 tsp. vanilla extract
- 1 tsp. baking soda
- pinch of salt
- cinnamon - optional
For the ganache: I doubled this recipe for the four layer cake and had extra ganache to serve with each piece of cake.
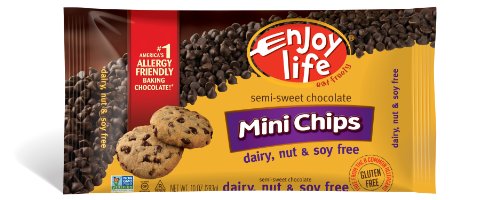
- 4 OZ unsweetened baking chocolate or Enjoy Life chocolate chips
- 4 tbsp. coconut oil
- 4 tbsp. maple syrup, optional, I didn't use.
- 1/2 cup almond butter
- 1/4 cup almond or coconut milk - optional, only if needed for consistency. I didn't need any.
For the topping (optional):
- raspberries
- blueberries
- blackberries
- mint leaves
Before I begin, I'd like to point out again that the cake ingredients above only makes ONE 9" round cake. You will need to multiply the recipe or make multiple batches if you'd like to have a layered cake like I prepared in the pictures. The ganache ingredients above would work well for a 2-layer cake, so I doubled the recipe to have more than enough ganache to add a coat between each layer of cake and the top of the cake, as well as left overs to serve with the sliced cake. The cake was delicious and so was the ganache, and thus - even better with extra ganache!
Cake instructions:
Preheat the oven to 350* F. Spray the 9" round cake pan(s) with coconut oil spray.
Add the dry ingredients together and mix using a hand mixer. Add in the wet ingredients and blend until thoroughly combined. The consistency will be sort of thick, not runny. Spread the batter evenly into the cake pan and bake for 20 minutes. Check using a toothpick between 18-20 minutes to see if the toothpick comes out clean. Allow the cake to cool completely, 15-20 minutes.
I made two double batches at a time for my four layers, instead of four individual batches. Be careful with your math!
Ganache instructions:
Melt the chocolate and coconut oil over a double broiler, stirring as it melts to combine. Remove from heat once the chocolate is fully melted. Slowly stir in maple syrup if using it, and allow the mixture to cool down. Transfer the mixture to a mixing bowl and add in the almond butter using a whisk or hand mixer to combine. If needed, you can add in the almond or coconut milk. Mine didn't need any.
Cake assembly:
Place a piece of parchment paper down (if desired) over your cake dish and place the first cake layer on the parchment paper. Spread the ganache generously over the top of the cake, allowing it to drip over the sides. Stack the second cake layer on top and repeat the instructions, completing the final layer with a heavy spread of the ganache and drip the ganache down the sides of the cake.
You can top the cake with anything you desire. I used fresh berries and mint leaves for decoration. You can also top with fresh flowers, sprinkles, etc.
Store the cake in the refrigerator until 10 minutes or so before serving. This will help keep everything fresh as well keep the ganache from getting too runny from any heat/room temperature. Store the extra ganache in an air tight container. When serving, spoon the extra ganache over each slice of cake. It isn't necessary, but is definitely delicious! Oh - and make yourself a cup of coffee. ;)
There's no set "serving" size for this cake because even a thin cut sliver of cake is plenty to eat because of the four layers. Also, this is different than the Paleo chocolate cake and Paleo ganache I previously shared.
I hope you enjoyed this recipe post and if you did then please share with your family and friends! Make sure to subscribe to the blog below if you haven't already so that you do not miss out on future posts.
You can find my previous Paleo recipes here. You can find all of my previous recipes here. And you can find my previous dessert recipes here.
Wishing everyone a wonderful week ahead!
XOXO
For fun:


